This kind of material for manual labor, like polymer clay, has been used relatively recently. And even in the recent past, even those who were fond of this kind of needlework, it was not so easy to find it. I had to look for or travel to the capital, and other large cities of Russia. Today, on the windows and shelves of any shops with goods for needlework, you can easily find polymer clay. It is used not only by designers, sculptors, and other masters. With the help of this kind of material, anyone can come up with and create a variety of decorations and decor elements. Very popular is the decor of the mug with polymer clay. It is such a cup, decorated with its own hands, can become a non-standard, creative gift, or simply an element of the interior decor.

Before buying clay, it is necessary to read the instructions for use. The choice of quality material plays a primary role.
To have an idea of how to diversify the interior with polymer clay, consider a specific example of decorating mugs with your own hands.

Preparatory stage
The first step is to take care of the availability of all necessary materials and components.
See also: 9 kinds of making interior dolls with their own handsNecessary materials:
- Scorched high-quality clay.
- Adhesive, which has a water-resistant effect and is resistant to high temperatures.
- A cup (or any other utensils at your discretion).
- Matches, toothpicks for giving certain shapes, contours.
- Stacks, scalpels, knives.
- Acetone, or a remover for varnish.
- Roller or special rolling pin for rolling out clay.
That's the whole set of tools and materials that will be required to decorate the cups with polymer clay. If you start this lesson for the first time, it is worthwhile to read in advance the main principles and aspects of such craft, its features. You can watch video clips on the Internet.
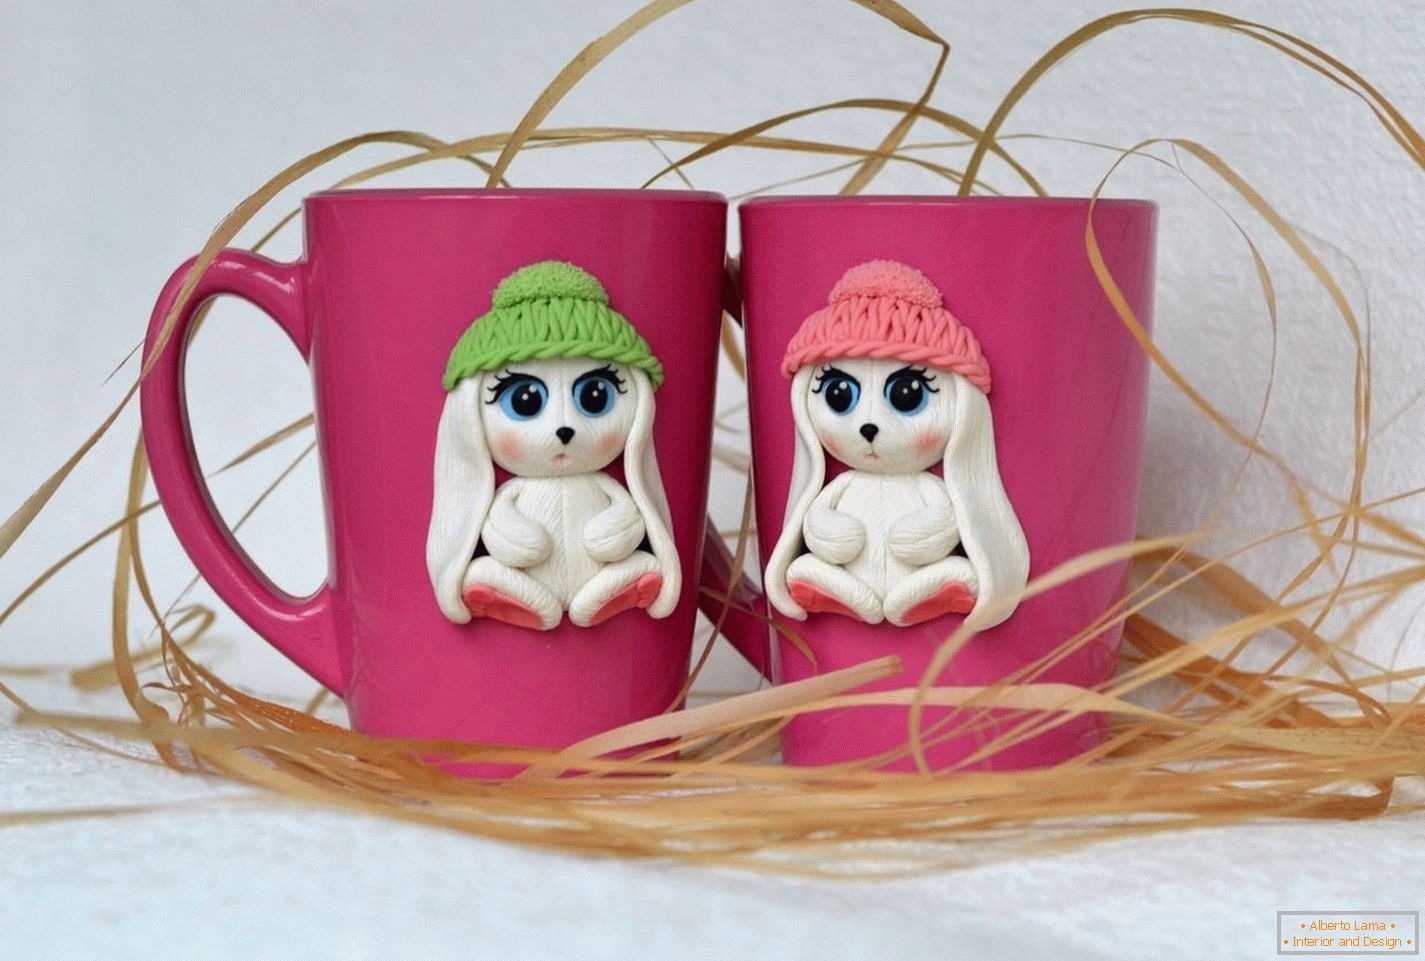
We will consider a specific example of a cup decorated with a bunny, which we will make from clay.

We decorate the cup with a bunny
First you need to arm yourself with a simple pencil and a piece of paper. On paper, we represent a bunny about the size we want to put on a mug. We make one more copy of the picture with copy paper. One version of the sketch is cut out. The second is inserted from the inside of the cup in such a way that the bunny is at the place where it will decorate the cup.
We begin to decorate the mugs, we make the figure of a little animal.
Choose a shade of clay of the color you want to make a bunny. Pretend it as a plasticine. It will not be difficult.
Then it is necessary to roll out the clay with a roller.
Put a stencil on the rolled surface as a picture of a rabbit and cut it out.
Carefully fix the resulting figure on the surface of the mug. Too tight should not be pressed, so as not to make unnecessary relief and dents.


With a stack, a knife, matches and other suitable tools, make a muzzle to your bunny. To begin it costs from hollows - it will be eyes.
Read also: Decoration of walls - 30 ideas with own handsThen shape the legs with that stack and toothpicks.
Make a small ball, then slightly flatten it. It's a ponytail.
In the same way, make two small flattened balls. It's eyes. They need to be placed in the existing pits for the peephole.
The color of the peephole is also made of the clay color you like and fixed. Do not forget about the pupils of black color.
The hare's nose is made in the same way. A small ball is made, then slightly compressed. Nostrils do with the help of a toothpick.
With the help of a thin flagellum, you can make a mouth and mustache.


If desired, you can decorate the hare with a bow, a flower, or something else, depending on whether the boy or the girl you made for decoration.
After you have finished the hare completely, the mug with the decoration should be baked in the oven. To set the desired temperature and holding time, refer to the clay instruction manual. It's easy and simple to bake a mug in the oven. After you have finished, carefully remove the hare. Then, using acetone, it is necessary to wipe the surface of the cup for the purpose of degreasing. And at the end, attach the hare to the cup with glue. It is best to leave the glue dry thoroughly for the night, or the whole day. The mug is ready for use.
It is important to remember that mugs decorated with polymer clay are not intended for washing in a dishwasher.


