The house is the place where you want to feel as comfortable as possible. There are various ways to make it even more cozy. But it's especially nice when the decor elements are made by themselves. Decorative panels in the interior always attract admiring glances, and it is not difficult to make them from improvised materials if you follow the technology correctly and act step by step and by instruction.
Determining the scope of work
The first stage in creating a wall panel is to decide on the design of the future product. If you already know where it will be located, then this complicates the task. We need to weigh the color solution, the size, what it will have, whether the material from which it is planned to make it fits into the overall picture of the interior.

So, we define: the size, the color decision and what materials will be used. This is the first step. If it is possible, then it is worthwhile to draw a sketch of the planned product. This will help to take into account all the nuances in the performance of the task.
If a piece of cardboard, a canvas or any other solid surface is taken as a basis, then markings are made on it: where and how the decor elements will be located. If the base is fabric, then it is stretched on the base (for example, on a piece of plywood, board or plastic), and the rest of the fabric is fixed from the back side. After the craft is done, it is placed in a frame and hung on the wall.

There is one more variant of manufacturing of a panel on a fabric basis. It will be necessary to take a solid base, for example, a gypsum plasterboard of the right size and glue foam to it. On the resulting soft base and stretched fabric. In this case, you can do without the frame.
After all the preparations you can proceed to the main part of the production: decorating.

Types of panels with their own hands
Consider the main types used in decorating:
| Fabric | These are all the varieties of embroidery, appliqués and tapestry techniques that are made on fabric. The technique of execution can be anything: from manual embroidery to machine, made by serial production. |
| Stone | Often performed in mosaic technique. Used natural stones, which are considered noble: basalt, marble and others. Less often in such products there is also an artificial stone. |
| Of ceramics | Are made with the use of ceramic tiles and are usually placed in the bathroom or kitchen. |
| Sculptural | A volumetric version of the product, which is made of special plaster, gypsum or metal. |
| Graphic | All that is done with different types of printing. It can be reproductions of paintings, photo printing. |
| Other types | Here you can see handmade products that are made using any improvised materials. Salty dough, wood, dried flowers and plants, shells, clay, beads - there is no limit to imagination for decoration. |

Let's give examples of manufacturing various types of panels:
From the prints of fruits and vegetables
When creating this panel can participate and the child, because it is very simple to perform. Bright, colorful design of this creation is ideal for the kitchen.
For production you need:
- Solid vegetables or fruits (these can be apples, any citrus fruits, pears, cabbage, etc.);
- Paint (gouache, oil, acrylic);
- The basis on which to decorate. It can be a cardboard, a board, a cloth stretched over a sheet of drywall.

The surface of the substrate is pre-degreased and painted in the desired shade. We cut the fruits and vegetables into halves and dip them into the paint. The dye is best poured in a thin plate. Apply the dyed fruit with the cut side to the base and get a stamp.
Stamps are made in any suitable place on the base, but images that are symmetrically located look best.

From paper
There are many options for making creations of paper. Let's look at the main ones:
Of round paper constructions
This product can be made by hand for an hour and it is an excellent way to decorate the interior, and also get a lot of positive emotions.
Prepare the materials:
- Colored paper;
- Staples;
- Scotch;
- Pins;
- Stapler.

Procedure:
- A sheet of paper folds an accordion, like a fan.
- Gimoshku bend in half.
- Stapler fix the edges of the fold, so that the accordion does not disintegrate and a small fan turns out. We connect three such fans and get a circle.
- Garnishes of different colors can be combined in one circle, then the panel will get even brighter.
- A lot of circles join together, attaching them to the wall with safety pins. The size of the circles and the composition itself can be anything large and take any form.

From photos
In fact, this is a collage of photographs or art images, which can both have a specific theme, and be absolutely abstract. Photos are combined into one composition and fixed on the wall, or on a different basis. Design option: combine many images of the sea and sky.

Of colored paper
Options for the manufacture of crafts made of colored paper are many. Today we offer the option "Flowers from hearts", which is suitable even for children's master class. It is very simple to perform, it is an excellent tool for the development of small motor skills of a child, and it looks amazing!

We need:
- Office colored paper;
- Basis for the panel;
- Pencil;
- Scissors;
- Cardboard;
- Paints;
- Brushes;
- Frame.

Let's proceed to:
- Cut the pattern in the form of a heart. To make one flower, we need from eight such hearts. All hearts in the flower should be the same size.
- Fold the heart in half and get a petal.
- We glue the flower from such petals to the base. This can be cardboard or a wall.
- To make the leaves of the flower, you need smaller green hearts.
- Lay out the flowers in any order, depending on the overall shape of the desired panel. It can be a heart shape, and you can lay flowers and in the form of a tree. We show imagination and embody it in life!

From the newspaper tubes
Newspapers can be great for making a picture with your own hands.
Necessary materials:
- Newspapers;
- Knitting needles for knitting;
- Glue;
- Wire;
- Brush;
- Knife;
- Acrylic paint.

Procedure:
- We cut the newspaper sheet into two parts.
- We apply a thin layer of glue on these parts.
- We wind the sheets of newspapers on the spoke diagonally. Thin tubes should turn out.
- Take the acrylic paint and paint the newspaper tubes in the right color.
- Spread the resulting flagellum glue once more and wrap the ends of each newspaper tube so that a spiral is obtained. Both ends need to be twisted in opposite directions if you want to get a seahorse shape. You can make a circle: for this you just need to roll the whole tube in a spiral.
- Spiral we fix with elastic bands and leave for 24 hours for drying.
- We remove the rubber bands and compose the desired pattern from the resulting elements. Elements can be mounted on a wall at once, or you can create a panel on a previously prepared basis.
Circles of newspaper tubes can be painted in various colors, connecting in one circle a few shades. It is interesting to look at circles with a gradient: the transition from one color to another.

From wallpapers
This is an interesting solution that will revitalize your interior and give it even more comfort. There are several ways to make a wallpaper yourself:
- The technique of rags
Cut out the fragments from the existing wallpaper. Pieces can be of any shape, but must fit together. Consider the overall look of the whole future composition. For example, you can cut out squares with colors from three different kinds of wallpaper and combine them together into several rows in a certain sequence. In this case, the pair elements do not necessarily have to be symmetrical.
Read also: Decorating the cabinet with your own hands - 5 ways 
- Technique of whole wallpapers
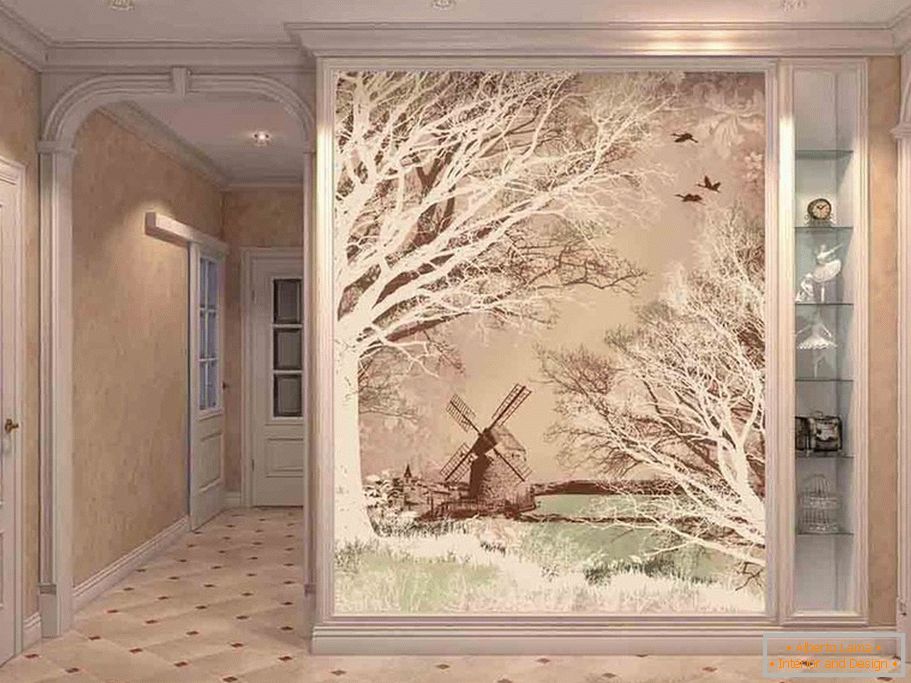
We take the wallpaper with the desired image (for example, the cherry branch), carefully cut it and insert it into a frame, or paste it on the wall and decorate it with moldings or panels.

- Combination of styles
Here the design is limited only by your imagination! Combine the whole pieces of wallpaper with small cut out fragments. This is a modern and inexpensive way to decorate your home. Important! If you can not decide on the style of the future composition, then you should look at the image of flowers and plants in soft colors. It is always appropriate and looks beautiful.

From salted dough
This kind of panel is one of the most budgetary, because for its production requires a minimum of material and usually everything you need is always at home.
We offer a variant of a molded panel where your child's pens and legs will be printed. This creation will allow you to decorate your kid's bedroom in an original way and for a long time to preserve the memory of his childhood.

We need:
- Flour;
- Salt;
- Colored gouache (optional).

Procedure:
- We take flour and salt in two to one proportions. Two glasses of flour are mixed with a glass of salt, then water is added. The approximate volume of water for this amount of flour and salt will be 125 ml.
- Knead a steep dough. If it sticks to your hands, then add more flour. The dough should be elastic and do not stick to hands.
- If you want to make the panel colored, then it's time to add gouache, decorating her dough.
- Roll out the dough. The approximate thickness of it should be about 2 centimeters. The shape of a piece of dough can be any.
- We bring the dough to the baby and gently squeeze his palm and foot into the mass. Pressing should be easy, but sufficient to leave a trace.
- We make in the test two through holes - this is for the future ribbon, on which the panel will then hang.
- We put everything on a baking sheet and close it with baking paper.
- Preheat the oven to 90 degrees and put the dough there for drying. It will take approximately two to two and a half hours. It is necessary to turn the dough gently once, in the middle of drying.
- We color the resulting panel with colored or white gouache, insert the tape into the holes - voila! Very touching and pretty decoration for your house is ready!

From fabric
The decoration of the panel with cloth has become fashionable not so long ago: only in recent years fans of hand-made maid have paid close attention to the cloth. This product is ideal for an interior in the style of Provence. Consider the main types of woven panels that you can do yourself:

Patchwork
Various techniques are used to make such panels, but one thing is common for all: this is the use of cloth scraps in a work. On the Internet there are many patterns of such products. Panels can be both on a fabric basis, and on rigid designs. Fabric for manufacturing any need: from pieces of tulle to scraps of old bed linen.

Felt for creativity
The panel made of felt is one of the most popular among needlewomen. We need only pieces of felt of different colors, a pattern of future details of the picture, thread with a needle or glue and the base on which it is planned to fix all the details of the panel. Felt - very fertile material for creativity: it will help to translate all fantasies into life. The panel of felt will be an excellent decoration of the living room or hallway.

Panels from burlap
The burlap looks extremely unimaginative, but begins to play quite different colors, when the masters apply it in their work. Sacking you can wrap a frame for the panel, you can use as a basis for other materials: beads, lace and others. This rough material perfectly emphasizes the tenderness and subtlety of other tissues.

Panel of wool
Panel of wool является самым простым изделием в технике мокрого валяния. Это интересный процесс, в котором шерсть уплотняется определенным способом для того, чтобы получить войлок. Рисунок на таком панно может быть любым: все зависит от мастерства рукодельницы.
Read also: Decor bottles with their own hands - 50 ideas 
If you want to take a one-color piece of cloth and draw a certain picture on it, then consider that it's not as simple as it seems. It is worth to practice on the draft, and then go to the fabric that you plan to use on the panel.

From beads
In this version of the panel all or part of its elements are made of beads. To begin with, the elements themselves are made, and then fixed to the base and, if desired, framed.

Of threads and nails
This is not a new, but very interesting way to make a picture with your own hands! There is minimalism in the choice of materials, but from this the panel does not become dull and boring, but, on the contrary, attracts admiring glances.

The whole point is that cloves are clogged on a solid foundation. This can be done chaotically, but it is possible and according to a certain scheme, which can be successfully found on the Internet. Nails are stretched between nails in several layers. Thanks to this, a picture is created.

From the buttons
Ideal for beginners! With buttons you can decorate a panel made of cloth or paper, or you can create a product entirely made of buttons. This will require
- PVA glue;
- Buttons;
- Basis.

Procedure:
- Draw on the basis of a sketch: where the buttons will be located and what drawing they should all together represent.
- Glue the buttons with PVA glue to the substrate.
Design can be any: inscriptions, abstraction, flora and fauna and others.


Mirror panel
Современное панно, созданное из кусочков зеркал. Сложные его варианты смогут изготовить лишь специалисты, а простые – очень даже доступны для самостоятельной работы. Mirror panel станет дополнительной подсветкой в комнате.

Necessary materials:
- Mirror tiles;
- Liquid Nails;
- Basis with wooden slats, if you plan to glue the mirrors not straight to the wall.
The principle of operation is understandable: we combine different mirror pieces and fasten them in the right order to the wall or other basis for liquid nails.

Wooden panel
Are executed usually in an abstract style from the most different breeds of a tree. Very beneficial in the classical interior look wooden panels with inlaid semiprecious stones.


Dried flowers and leaves
Great for children's creativity. We are determined with the plot of the future work, and then on a solid foundation (cardboard, fiberboard) with glue we glue dried flowers and leaves (juniper branches, leaves of trees - any flora will do). Excellent addition will be grains, seeds and twigs.


Groats and seeds
On a solid, already painted base, a sketch of the future picture is applied. Then, the croup and seeds are fixed to the substrate using PVA glue. Large grains need to be glued individually, and a small placer, for example, rice, should be poured onto the glue already applied to the substrate.


Decorative plaster
A very expensive and time-consuming process. Everything is done on a previously plastered surface. A sketch of the drawing is done, and then the special plaster is applied using a stencil or is self-corrected by tools. This kind is used to decorate walls and ceilings with various images.


Plaster putty
By analogy it is similar to the process of manufacturing from decorative plaster. Perhaps, it will take a little more effort, because all the reliefs in the image on the panel are made using a special syringe or spatula.


Decoupage
The panel, made in the technique of decoupage, can decorate any wall: whether it's a kitchen or a corridor. This technique is to paste on the selected surface carved pictures, decor elements, and then cover it with several layers of varnish. The general idea of a work can be any.


Quilling
Very entertaining production techniques. The strips of colored paper are twisted into a spiral, and then the whole product is formed from similar spirals. This is a simple and interesting form of creativity.


