Make a panel on the wall with your own hands - this is a great opportunity not only to make a beautiful original decoration for an apartment, but also to make an element of home warmth and individuality. This element of decor is also used by designers to mask defects and uneven surfaces, protect the coating from dirt, and also to visually increase the space. In order to make a panel of improvised materials with your own hands, you can use fabrics, leather, paper, photographs, threads, beads, bottle caps, mosaic, fragments of glass, cereals, shells, stones and much more. In this article, we will consider some original ideas for making such a decor with the provision of their photos. Inspire with us and bravely grasp the decor of your home.
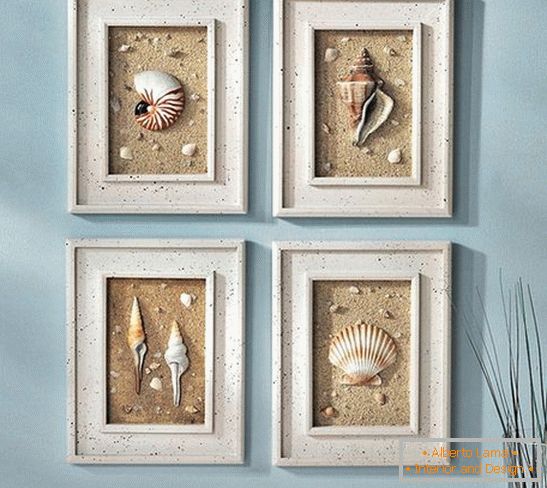
Panels of shells with their own hands
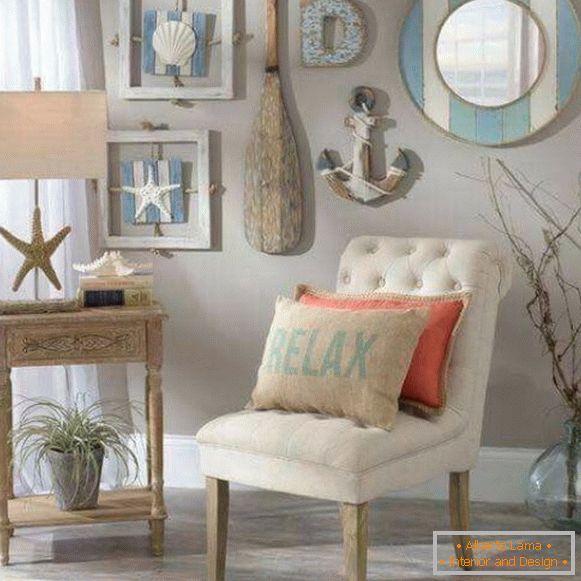
Resting on the seashore, children are very fond of collecting various seashells scattered on the coast. But when they come home, they often simply do not know what to do with them and how to apply them. Deployed on kulekkam, seashells and beautiful pebbles only replenish the contents of cabinets and shelves, where they remain for many years. But they can be an excellent material for creating a panel on the wall with your own hands. A wide variety of their shapes and colors will help create excellent compositions that will decorate any room, especially if the interior is decorated in a marine style.
Preparing to create a panel on the wall with your own hands from seashells
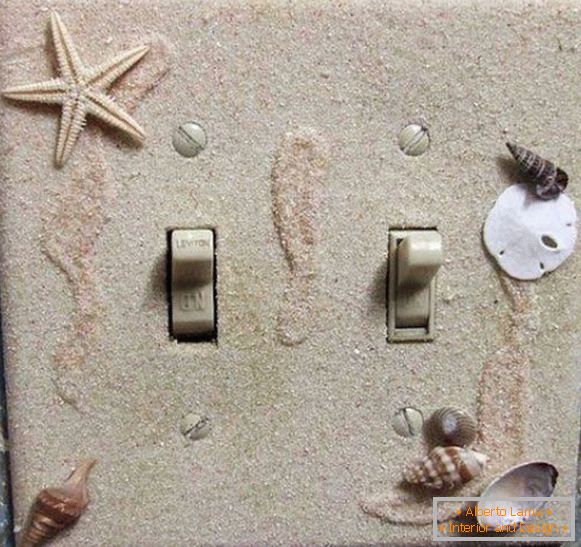
The panel of shells will require the presence of such details as: seashells, frame (you can use a photo frame, board or veneer), glue, acrylic paints (stain, nail polish). It will also require material for the background - cloth, burlap, mesh or sand. Depending on the sketch, there may be additional elements - beads, buttons, pebbles, rhinestones, etc.
First of all, the shells need to be processed - washed, dried and sorted by type and size. In order to give them brightness, leaving the same color, they can be covered with stains or clear nail polish. Some drawings of the panel with their own hands will require different colors. In this case, the shells can be painted with acrylic paints, or use as such a solution of potassium permanganate. The frame can also be processed, for example, painted in blue or white.
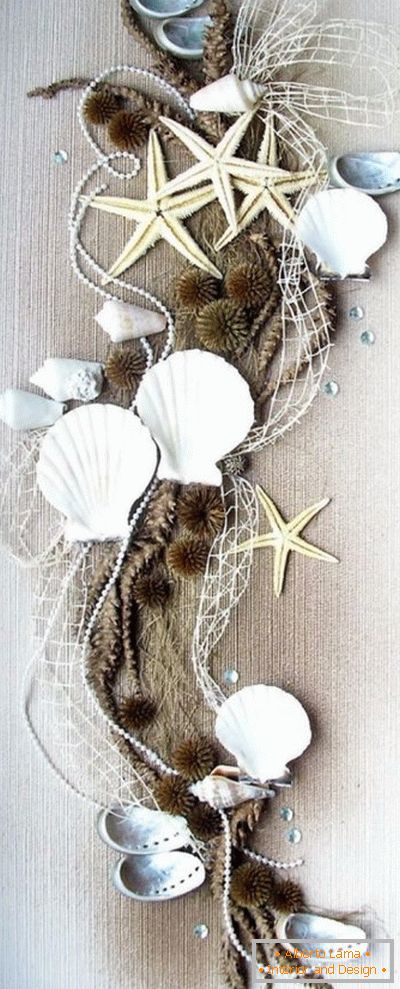
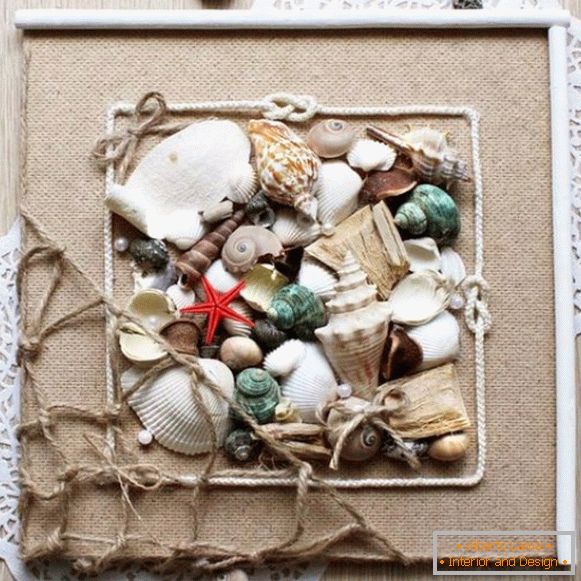
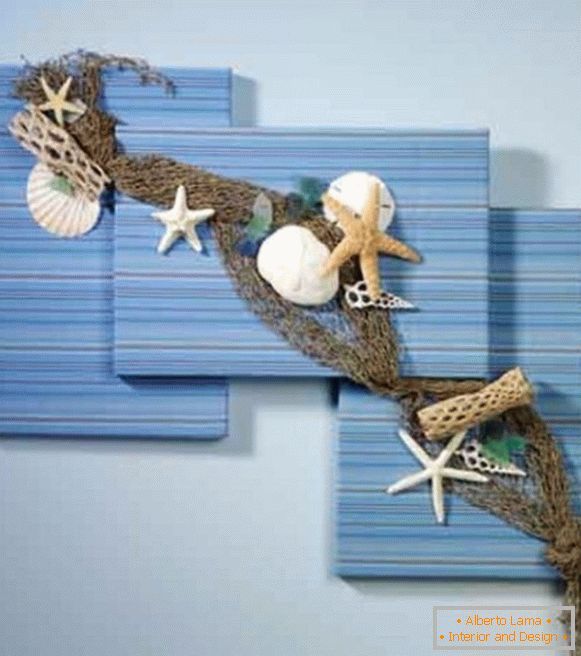
Various types of shells can be randomly arranged on the plane, which will look pretty attractive, as shown in the photo. And you can create various drawings of a panel with your own hands, for example, a sea landscape, a ship, a doll, flowers, etc. In this case, it will be necessary to make a preliminary sketch, which then to apply the prepared material.
Shell wall panel with your own hands for beginners: photos and basic manufacturing processes
Let's start with the simplest models that even a child can do. For example, a chaotic drawing. For this, it is necessary to initially apply a background fabric or sand with a glue to the substrate and assemble the frame. The background can be painted in any suitable color before gluing the materials. Some pictures assume uniformity. In this case, the complete composition is already painted. Now we begin to glue various shells. In addition, you can decorate empty spaces with beads, threads and other improvised materials.


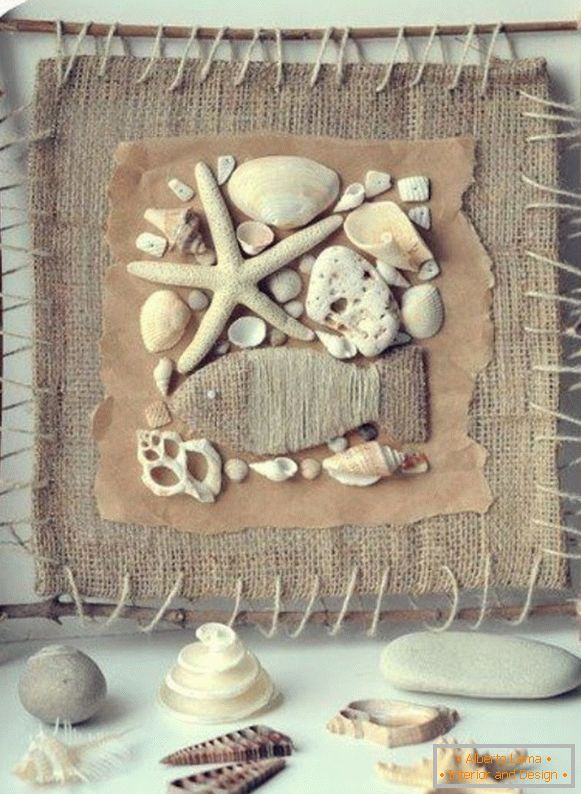
Pretty beautiful (and we can see it in the photo) looks like a picture of a seashell in the form of a sea landscape. It is not difficult to make a similar picture, and it will remind you for a long time about a good rest by the sea.


Advanced versions of the panel on the wall with their own hands from shells
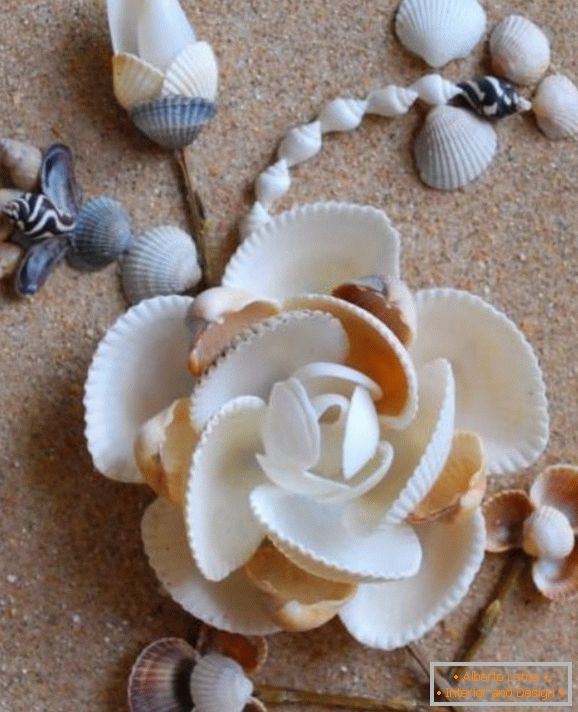
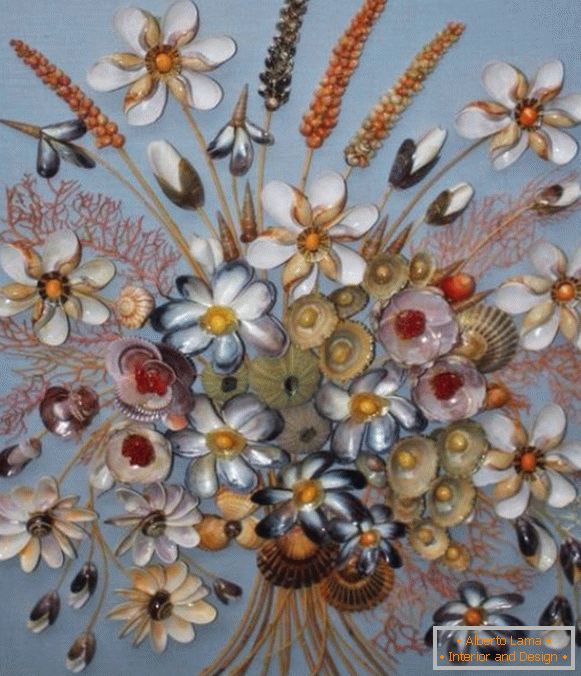
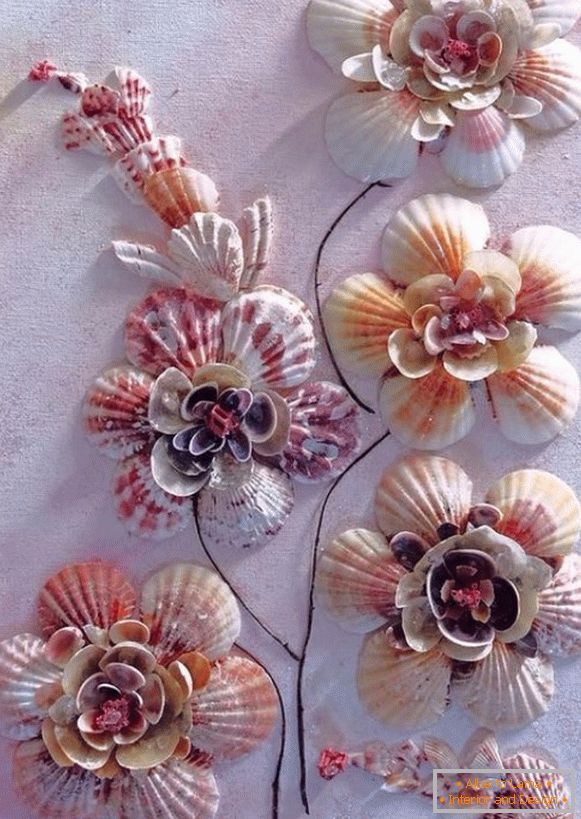
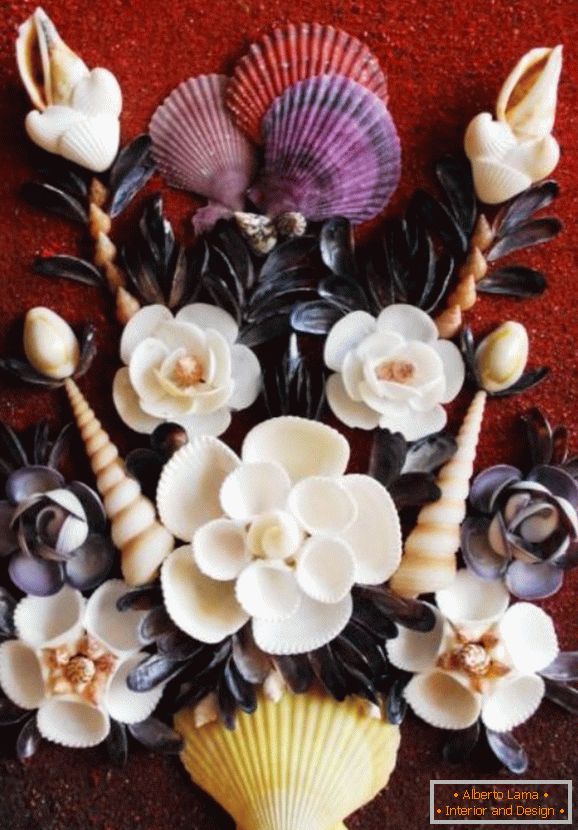
Panno, like artistic paintings, can have a variety of subjects. For example, a panel of seashells can represent a lush bouquet, which, as seen in the photo, will look very realistic and voluminous. For this, the shells should be given different shades with the help of paints. Initially selected suitable for the size of seashells, of which buds are formed, and then the middle. As stems, you can use a thick thread or rows of beads.


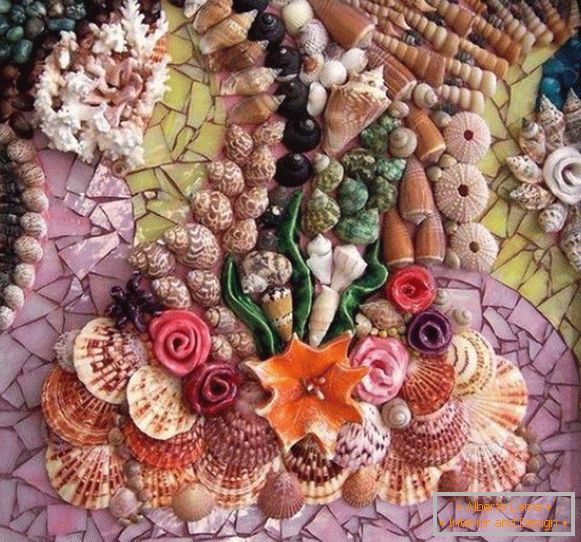
Sea pebbles can most successfully transform such a picture. In the photo we see how elegantly the panel of shells and stones looks. If there is a desire to depict any animal in the picture or to create a portrait, it is necessary to take care of a sufficient number of identical sized shells. Below are examples of such works.


Panel on the wall with your own hands from coffee beans
The panel of coffee beans will perfectly decorate the interior of the kitchen, introducing the relevant decor element. Such paintings can be made for other rooms, selecting the appropriate drawing. It can be images of various cute animals for the children's room, beautiful hearts for bedrooms, etc. In order to make a panel of coffee beans with your own hands, you will naturally need coffee beans, glue (PVA, "Moment" or, most convenient, glue -pistol), the base in the form of plywood, boards or photo frames, as well as additional elements: fabric for the background, felt rope, burlap, scissors and pencil to create a sketch.


Some craftsmen manage to form whole portraits and pictures from coffee beans, but such work requires some skills, so it's worth starting with more simple pictures.
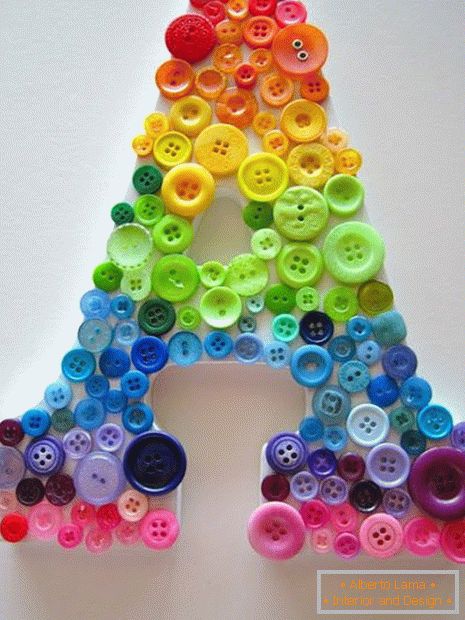
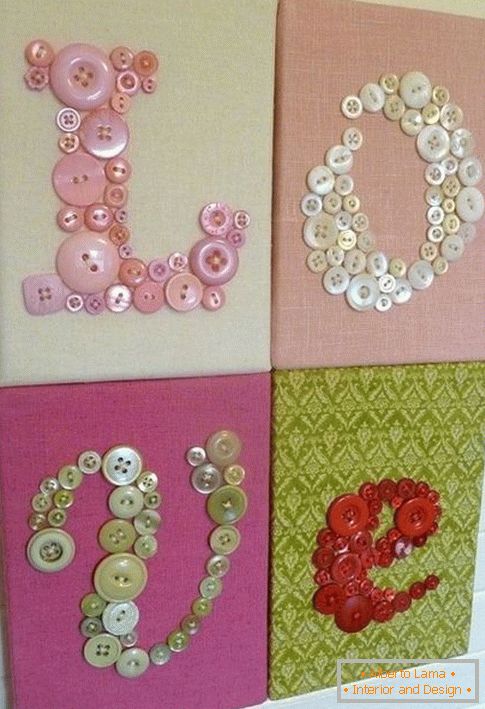
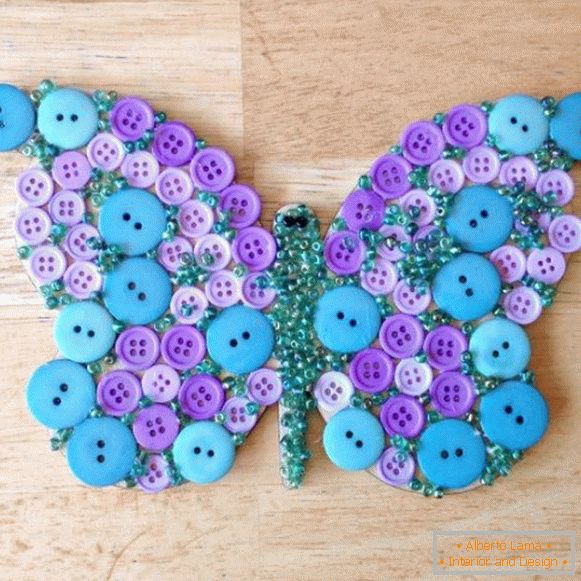
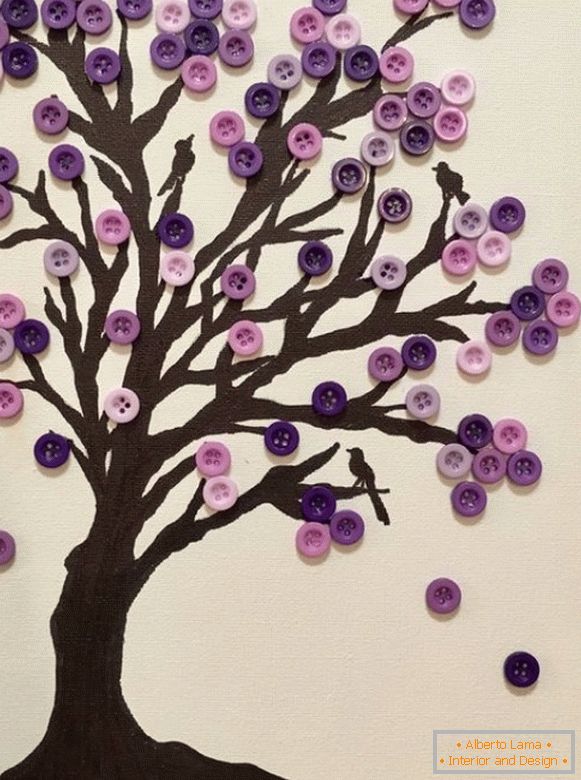
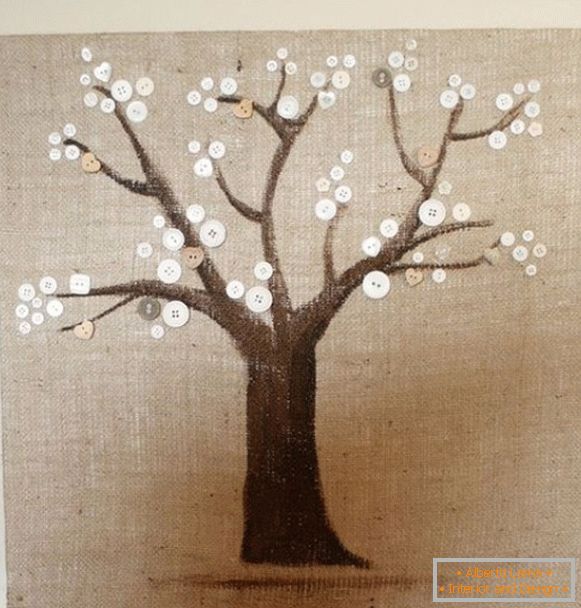
Panels with their own hands of buttons
Many housewives certainly have whole boxes with various buttons left after the worn out things. They can and lie for years, not finding an application, as an unnecessary trash, which is a pity to throw. But after putting a little imagination and creativity, you can make them a beautiful wall panel with your own hands. For example, using the least popular, green and brown buttons of different shades, you can create a wonderful "money" tree, as shown in the photo. At the same time, from the handy materials only a board, glue and a pencil are needed to sketch the sketch. All this is available in any household, so the design of such a panel with their own hands will not entail material costs.


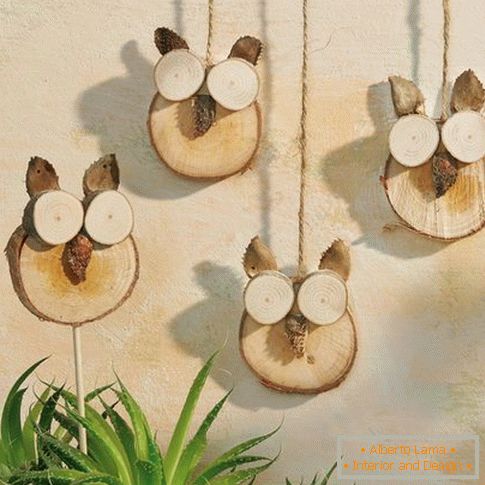
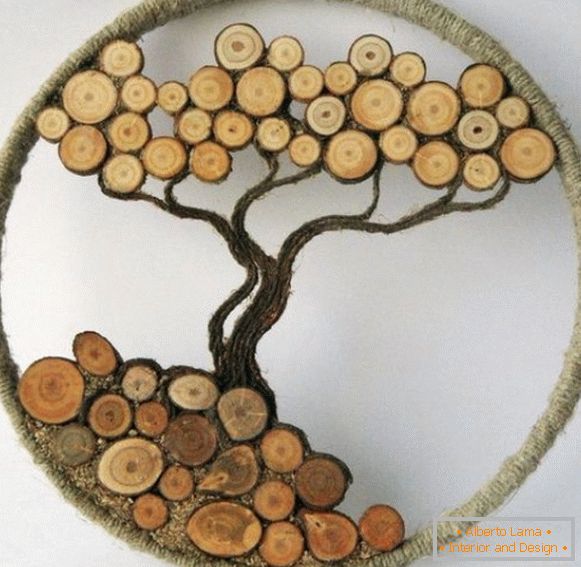
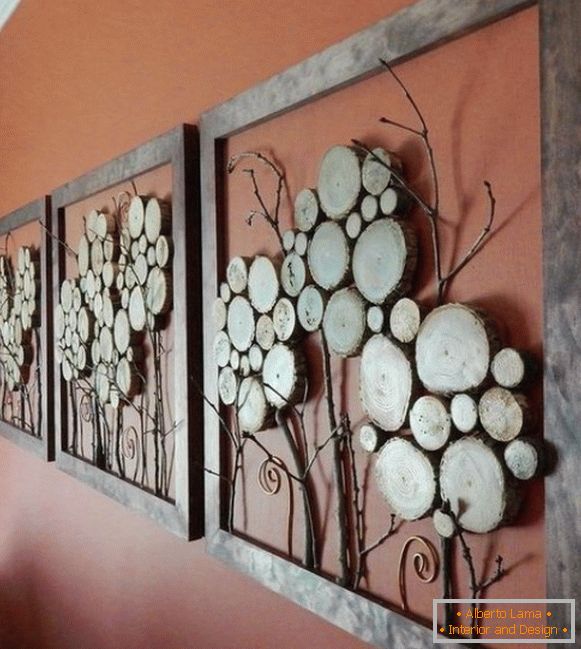
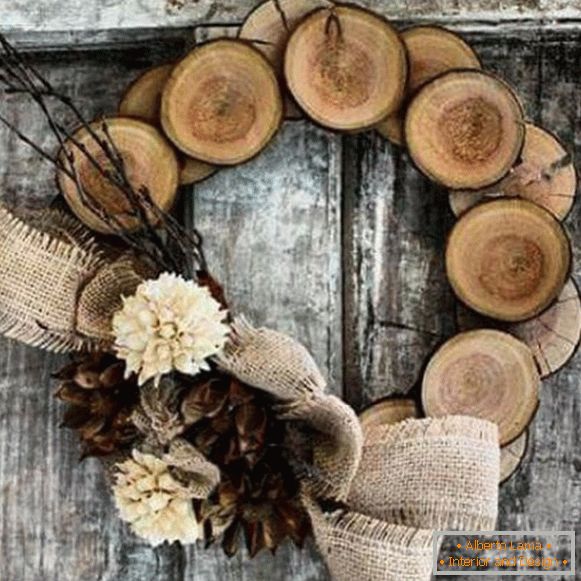
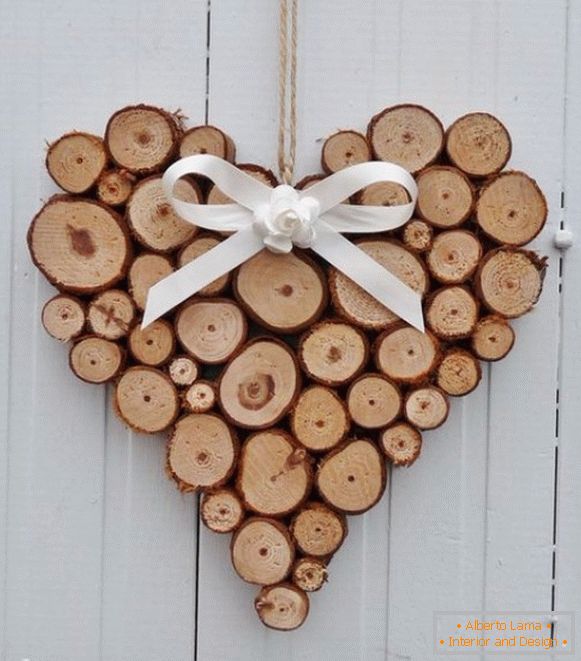
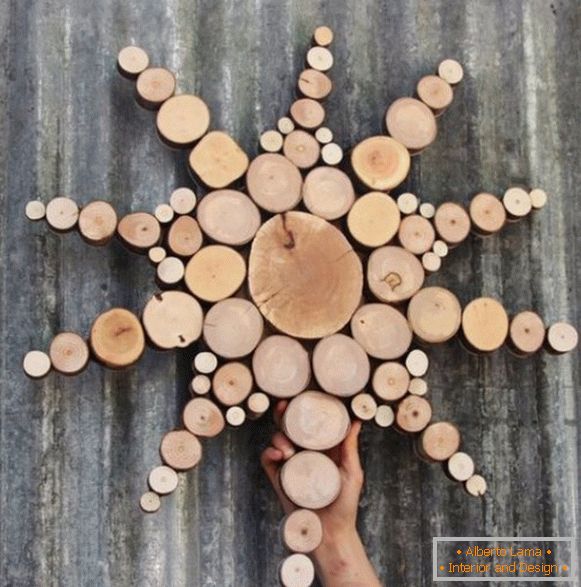
Wall panel with your own hands made of wood
One of the modern trends in interior design is the use of eco-materials, in particular, wood. In such conditions, the best option for decorating an empty wall will be a wood panel made of wood with its own hands. Let's look at how to make a picture with your own hands, using tree branches.
All that will be needed is: a sheet of cardboard or chipboard, glue (it's better to use hot melt, which freezes very quickly), a hacksaw, varnish and brushes and, of course, branches of different tree species that differ in thickness. To decorate the frame, you can use wooden slats or a baguette.
The dimensions of the canvas depend only on personal preferences. Before making a panel, you need to think about what shape it will have, the dimensions and possible shades.
Initially, a frame is made. Here you need an additional tool - a chair, which allows you to cut the workpiece at an angle of 45 degrees. The finished frame is fixed to the base with the help of small nails or a stapler. Then cut from the branches of the pyatka, and the thickness can be different.
The finished billets are placed on the canvas in a chaotic order, starting from the largest ones and ending with small ones that will fill the formed voids. When everything is ready, and the canvas is completely filled, we proceed to glue all the fragments. After this, it is necessary to wait for the glue to dry and apply a coat of varnish. It will serve as an additional decoration, making the picture glossy and, moreover, create a protective layer of moisture and harmful insects. At this, the manufacture of the panel with your own hands can be considered complete. It will remain only for its installation.


Read also: Decor for the house with your own hands: description and photos of interesting ideas
Decorative panels with their own hands made of paper
To create a delicate and unusual interior, you can make your own "butterfly" panel. The photo shows how creative such a product looks in the interior design. And, if not to be too lazy, paper butterflies can be decorated with different beads, and the wings made figured using special scissors. The surface for applying these small elements can serve as the wall itself, and plywood, which is installed on the surface. Attach the butterfly to the surface with a double-sided adhesive tape.
With paper, you can make a real voluminous panel on the wall with your own hands. For this, you need to take square sheets of colored paper and fold them with an accordion. Then, each sheet bends in half and stretches, resulting in a circle (the photo is located below). The figures are stapled together and fastened to the wall. Such a panel can serve not only as a decoration, but also cover a gap in a wall that has defects.


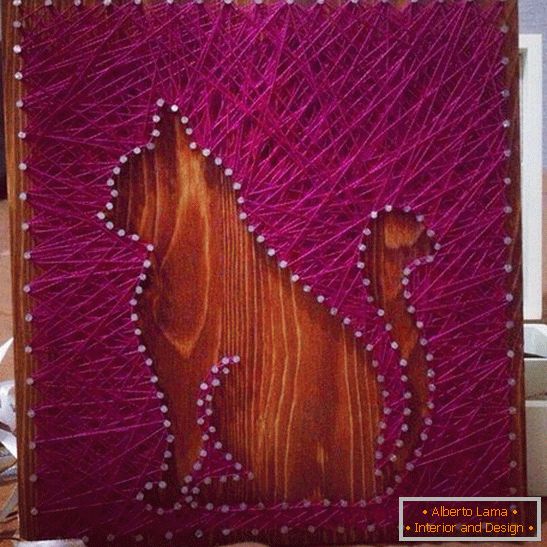
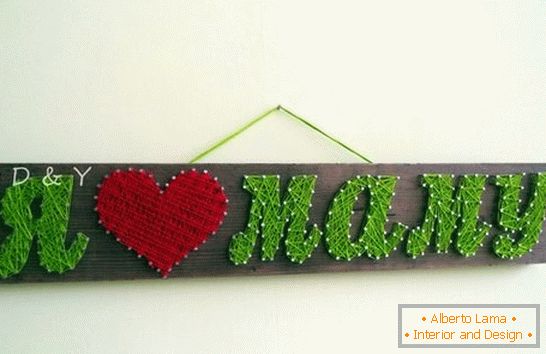
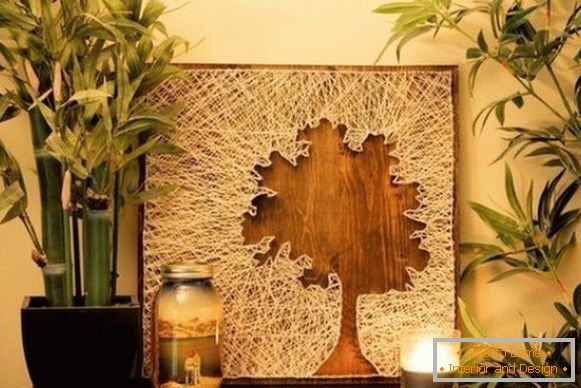
Panel on the wall with your own hands of threads and nails
A unique decoration of the interior can be a stylish panel with their own hands, made with the help of conventional nails and colorful threads. This art is called string art. The substrate for such crafts can be made of wood or polystyrene. In the second case, the nails can be replaced with pins. Cut out of paper sketch is applied to the base (it can be pre-painted in the required color with acrylic paints) and fixed around the perimeter with nails (pins). Then the paper tapers off neatly, and the nails are wrapped in threads in any order, but so that the thickness is uniform everywhere. Samples of such panels with their own hands are in the photo in our article. If it's difficult at first to come up with a sketch yourself, you can use the diagrams-drawings available on the Internet.


In conclusion, I would like to say that we have reconsidered only a small fraction of the whole variety of possibilities for making panels from improvised materials with our own hands. But even on their example it is clear that such decorations with a properly selected design can significantly decorate the interior of any room.


